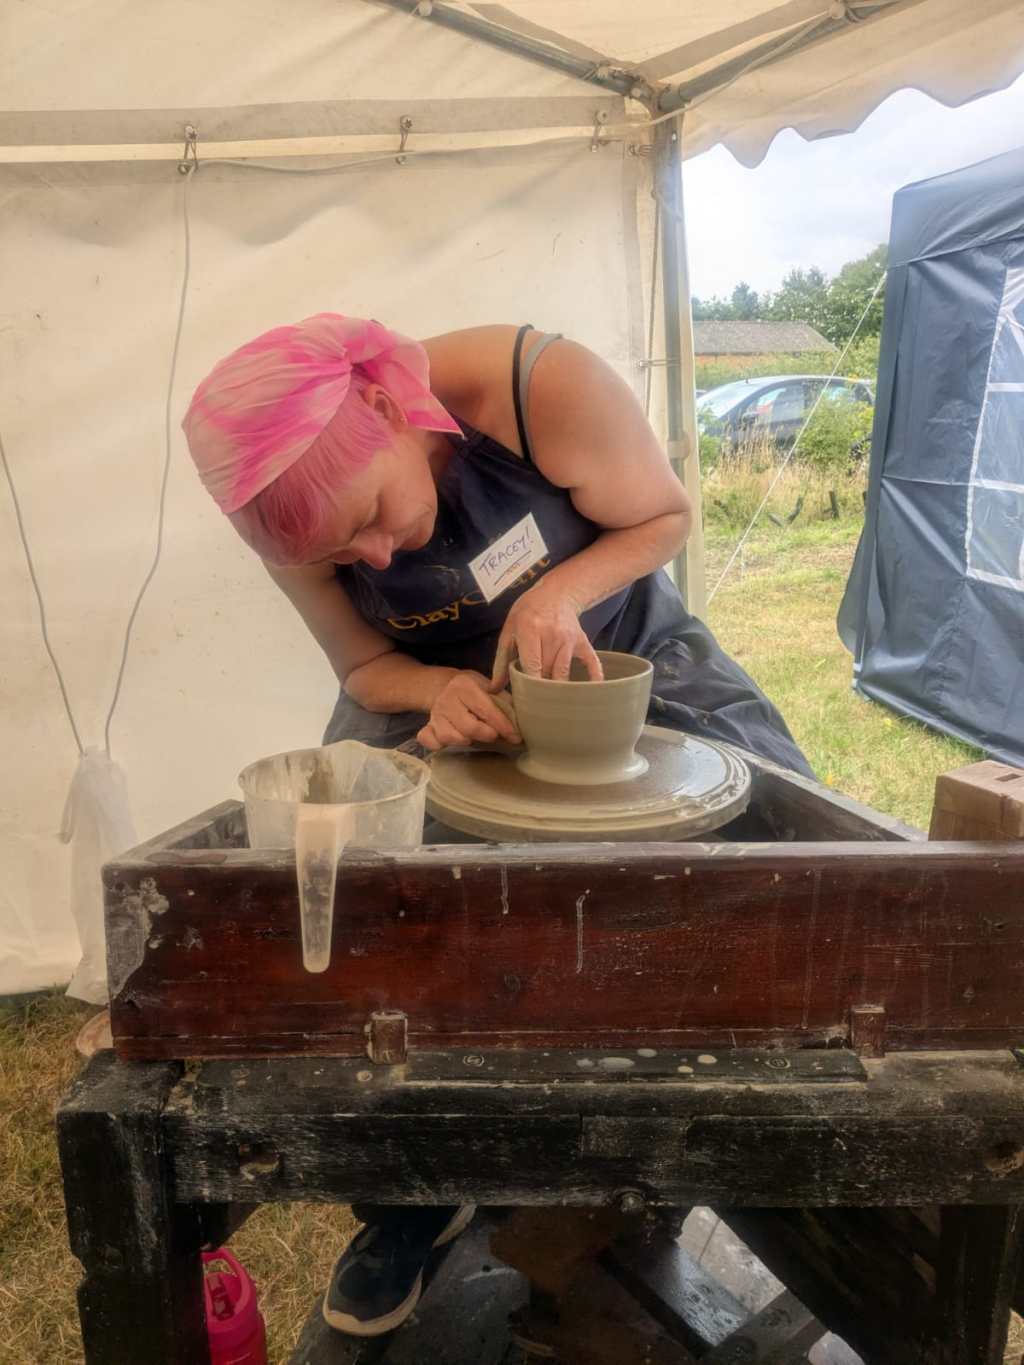
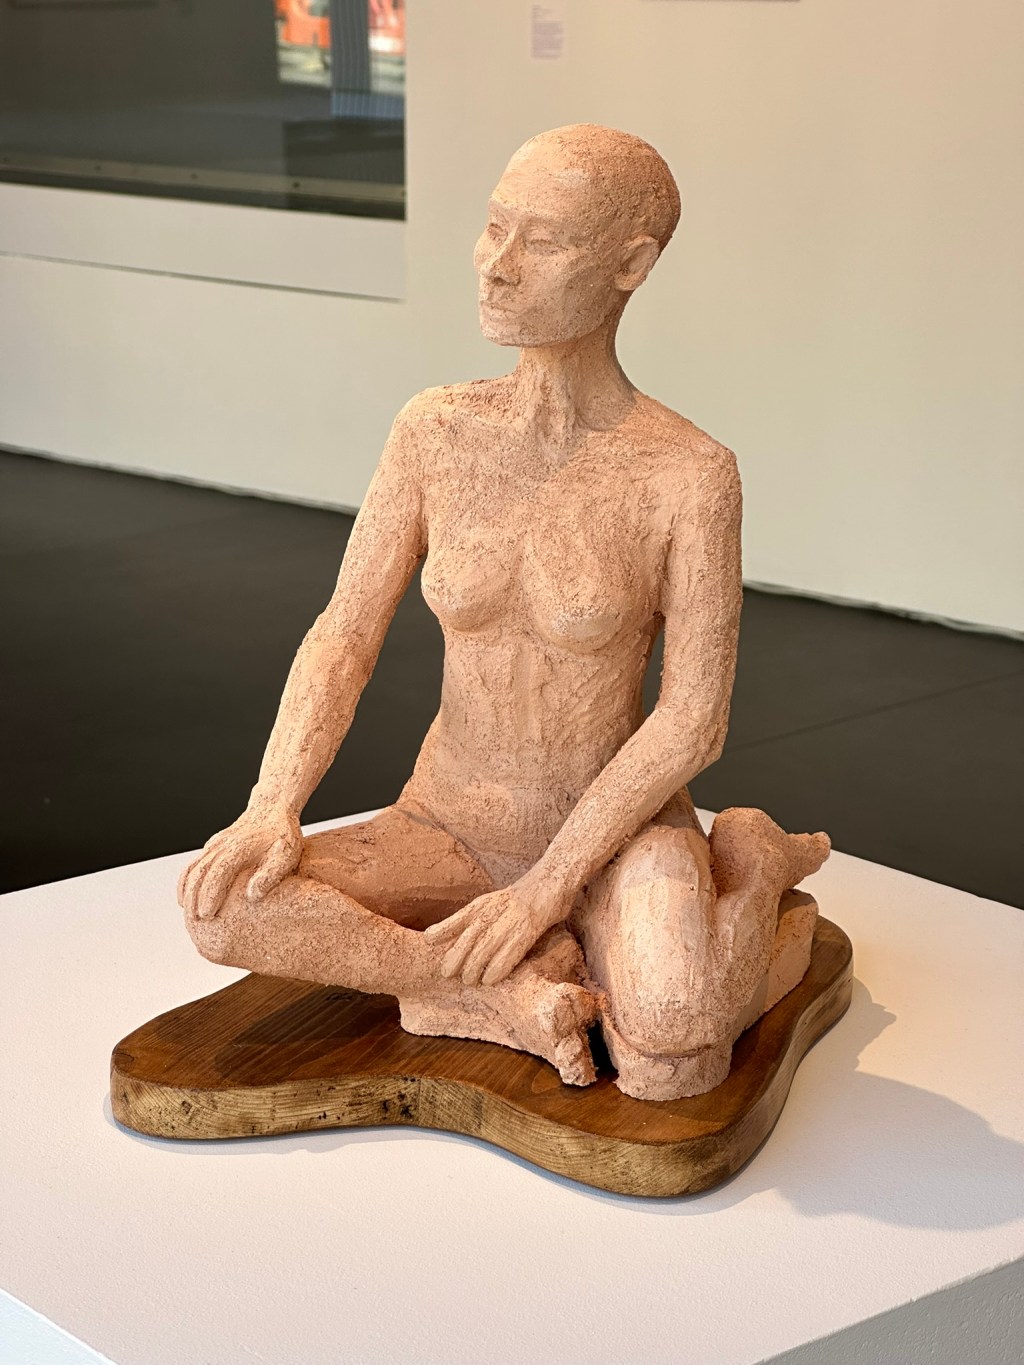
Hi there, thanks for scanning me, but I bet you’re wondering what I’m doing here in this big fancy exhibition, well, I’m part of an experiment!
After seeing a programme on Elisabeth Frink and the way that she made her bronze figures using a ‘Lost Wax’ method I really wanted to explore that process and see if I could turn my large clay figurative sculpture into a Bronze.
I loved how rough her Figures were, the way that the shape was indicated rather than refined and smooth and perfect. The programme explained a little of the process behind the making of the Wax sculptures in the small warrior series, and I was fascinated.
After my MA sculpture piece ( at Norwich University) I knew I needed to go and see Jim in 3D, and fortunately, because of animations model-making, I’m still a frequent visitor!
Jim in 3D does bronze pours within the sculpture workshop on a regular basis for all sorts of things, and as we had worked together on a previous sculpture of mine and we still collaborate on all sorts of experiments, I knew I could have a friendly chat about it.
I told him my idea, I ‘guestimated’ the size of the piece and Jim explained in depth about the process and how tricky it would be with my figure, but doable with time and care. He knew that a bronze of that size would be expensive and then we talked about the wax process itself and Jim mentioned that you can do a similar thing with 3D PLA prints.
I was intrigued…
I’m a big fan of 3D printing, I have a small Creality printer of my own and it gets used regularly, but how much detail could I take over, what if I was able to make a mini sculpture in bronze, so many things to play with!
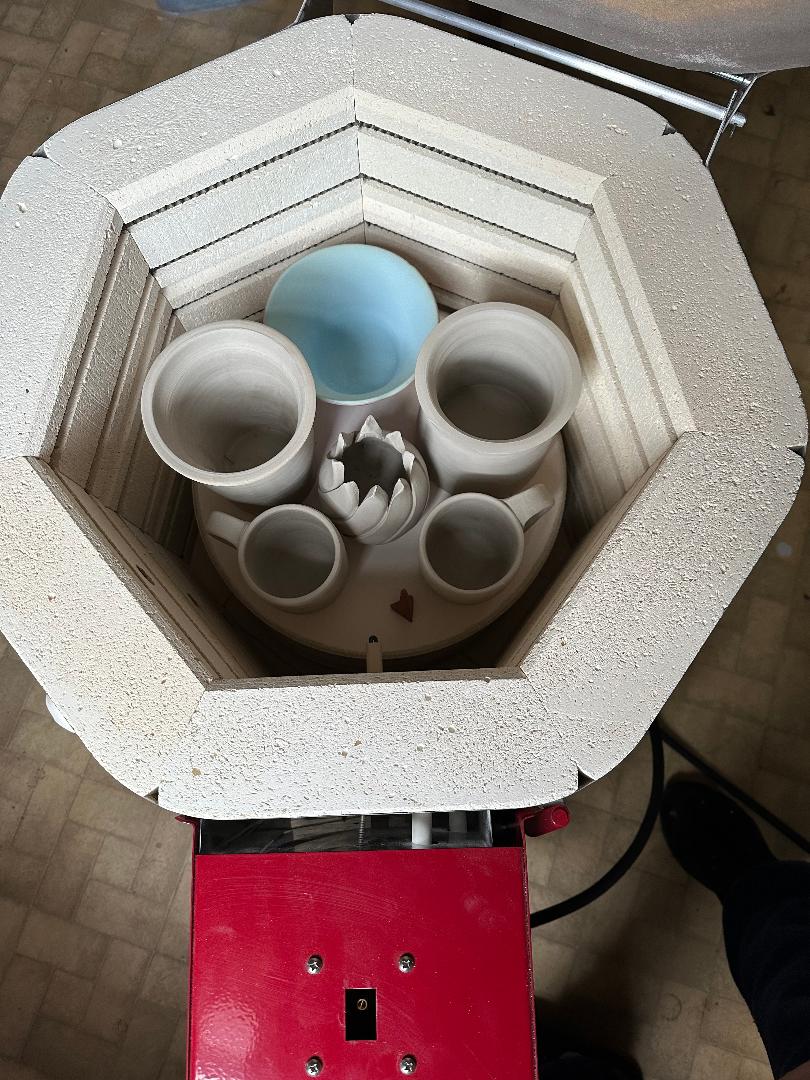
At the time Jim was scheduling in a bronze pour and offered to do a little test for me.
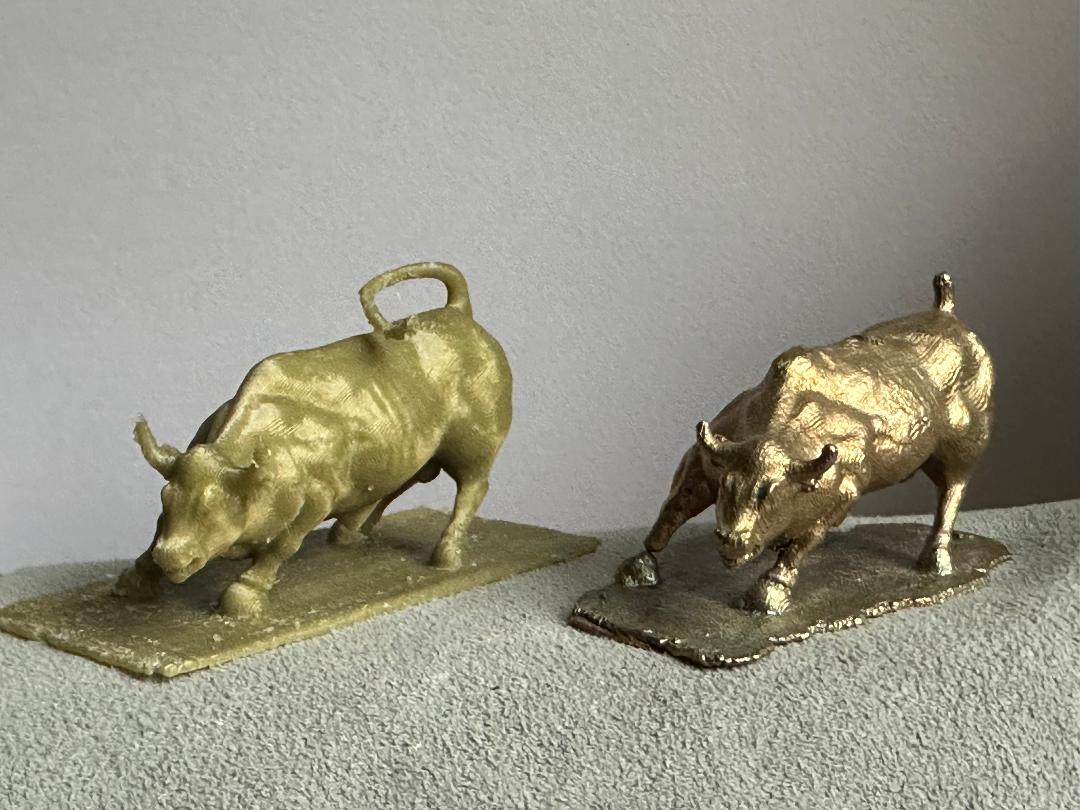
I didn’t have a scan of my sculpture, so I looked online for a good quality free object, and I came across a scan of the Wall Street Charging Bull in New York – it was originally 3D scanned by ScanTheWorld! But various free versions exist on Cults3D etc.
This piece meant something to me and my husband as we had been to New York for a big birthday and seen it in person, and it was bronze… it was meant to be!
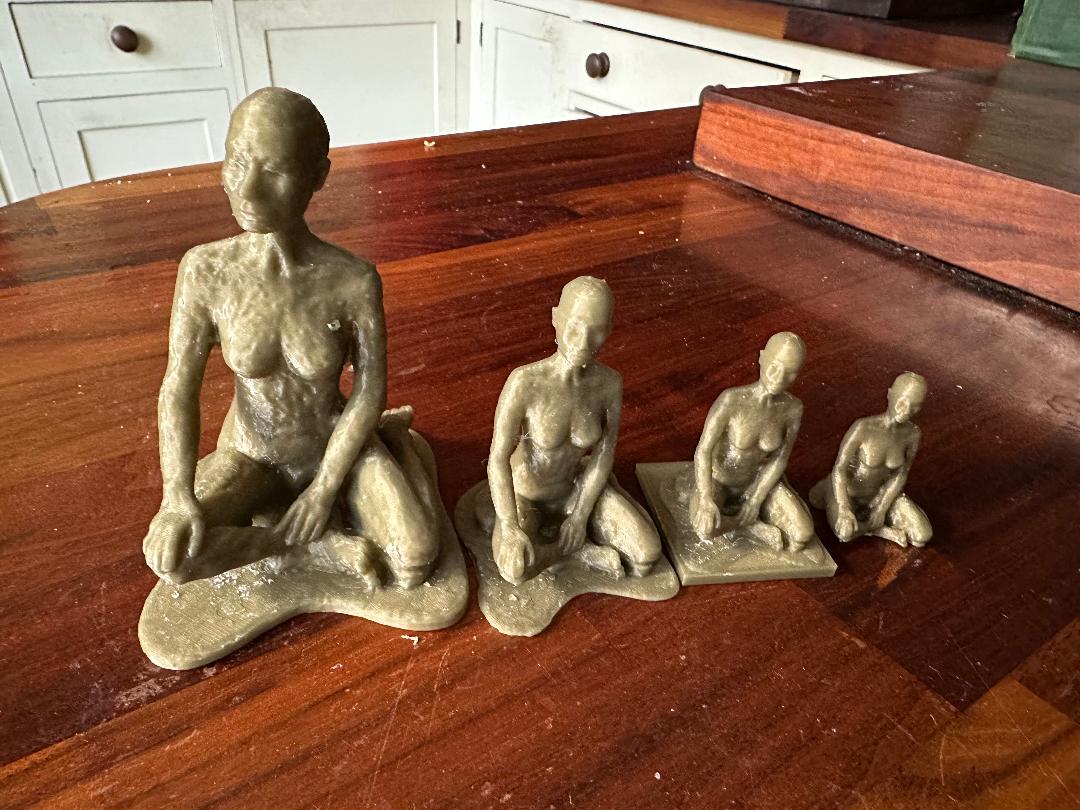
So I chose a bronzey coloured PLA (which calls itself ‘Gold’) and printed it out in various sizes so Jim could see which one would work best.
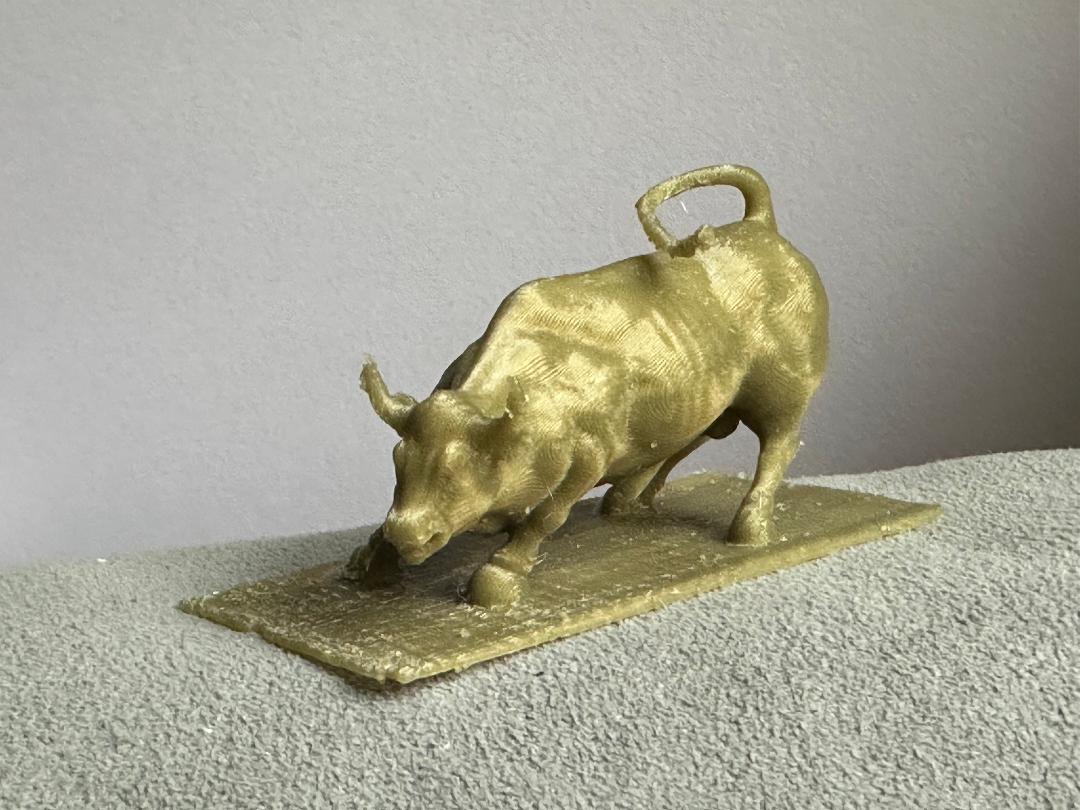
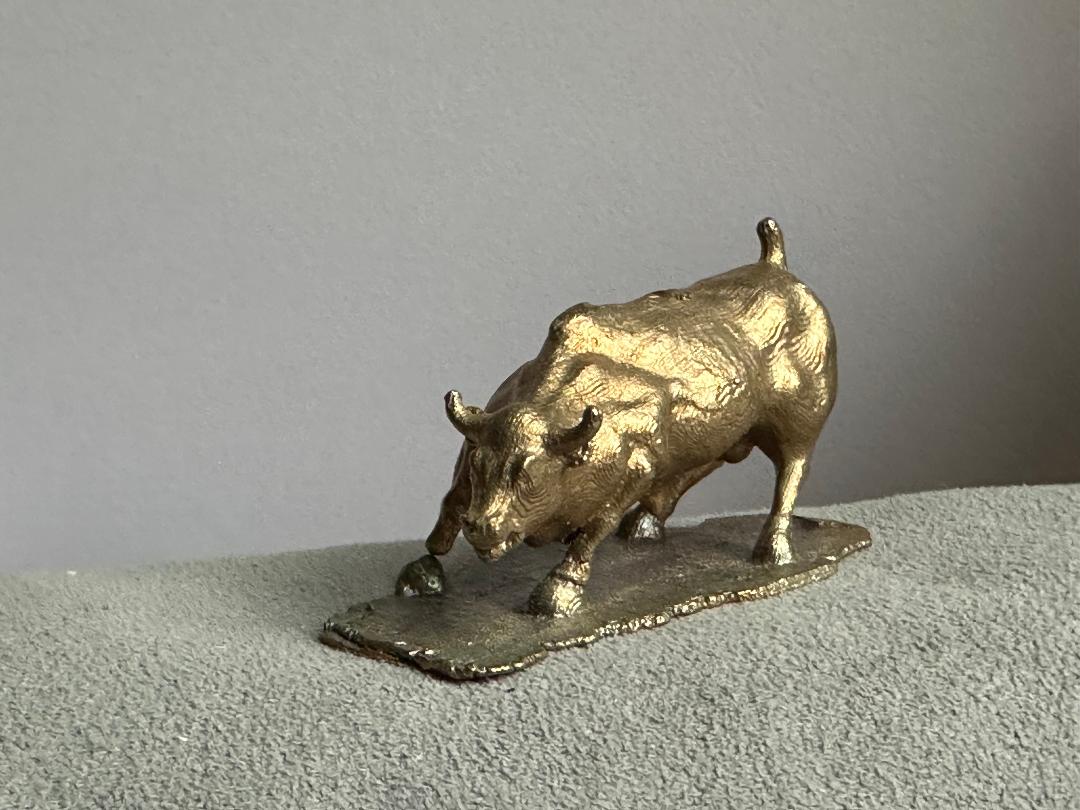
It was a pretty good print, but we had concerns about the tail, and the narrow legs, but as we both like to experiment and see what happens, Jim added the wax sprues it would need for the Bronze pour and in it went!
It took most of the detail fabulously, still leaving the striations that are a feature of 3D PLA printing. The tail did not survive and the front right fore-hoof also didn’t burn out as we had hoped, but for the most part it was a success!
So now I needed to make a good quality scan and print of my Sculpture.
I have tried 3D scanning in the past and didn’t get results I was entirely happy with, on the surface it seems ok, but that was mostly to do with the software using photos to recreate depth and shadow and the underneath point cloud being pretty low quality and not capturing accurate data, so because I’m particularly looking to capture that texture, I was looking for a better quality of scan.
After speaking to some of the other technicians they recommended both Kiri Engine
https://www.kiriengine.com/ & Polycam https://poly.cam/
Hundreds of photos later and hours spent tweaking and waiting for both of the engines to process their different approaches, I then needed to take it into a mesh editing programme to remove the weird extra polygons that seemed to creep into both of the scans, then to start experimenting with sizes, to see what will and won’t work in the next step of the process, the bronze burn-out.
and that’s why my mini is in the show, it’s part of my process and it also demonstrates how my creative process can develop through many different mediums and I’m learning all the time!