So my first day spent trying to rig my model, and it feels like I went 1 step forward and 3 steps back, the actual jointing all made sense and after watching the tutorial I created my leg joints.
I quickly drew out the hip to knee to ankle joint and was able to mirror the leg rig and feeling buoyed by my success I set about adding a body, neck and tail rig.

But can you spot the deliberate mistake? Of course I had based this on working from the hips, the same way as the tutorial, birds don’t have hips, their ‘knees’ bend backwards and they have wings… My model for the purposes of this module doesn’t have wings as I felt it would be far too much to try and model and control in my first MAYA project. But, I needed to go back and create a more birdlike structure for the rig.
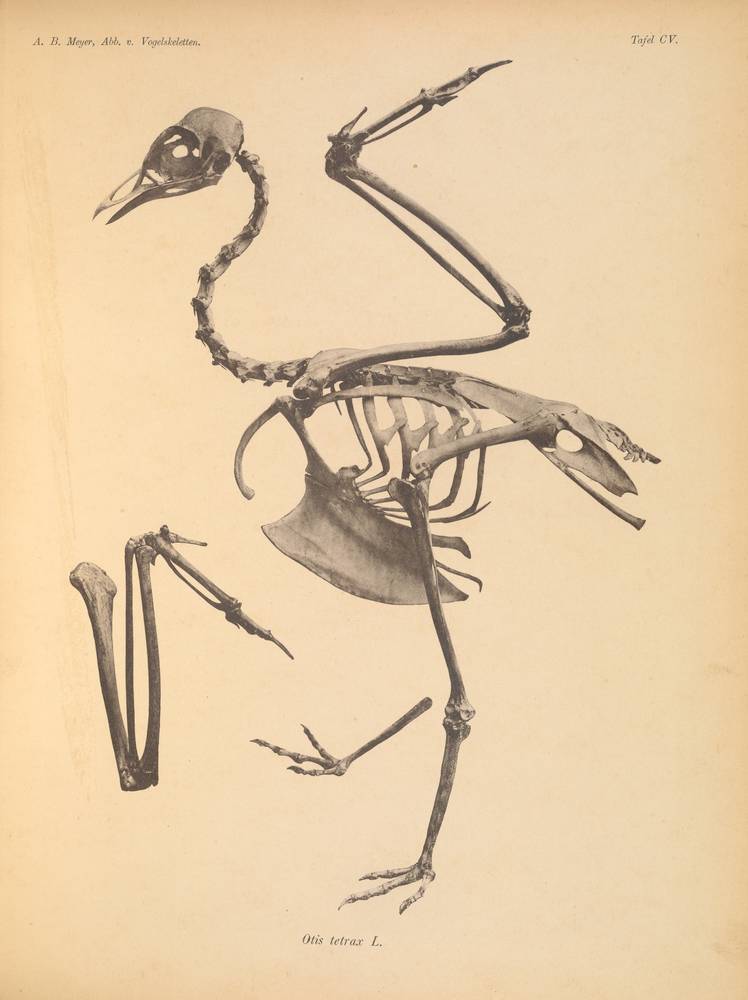
A quick google and I actually managed to find a skeletal illustration purporting to be a little bustard, so hoping it was close enough, I worked up a new rig for my model (again leaving out the wings structure).
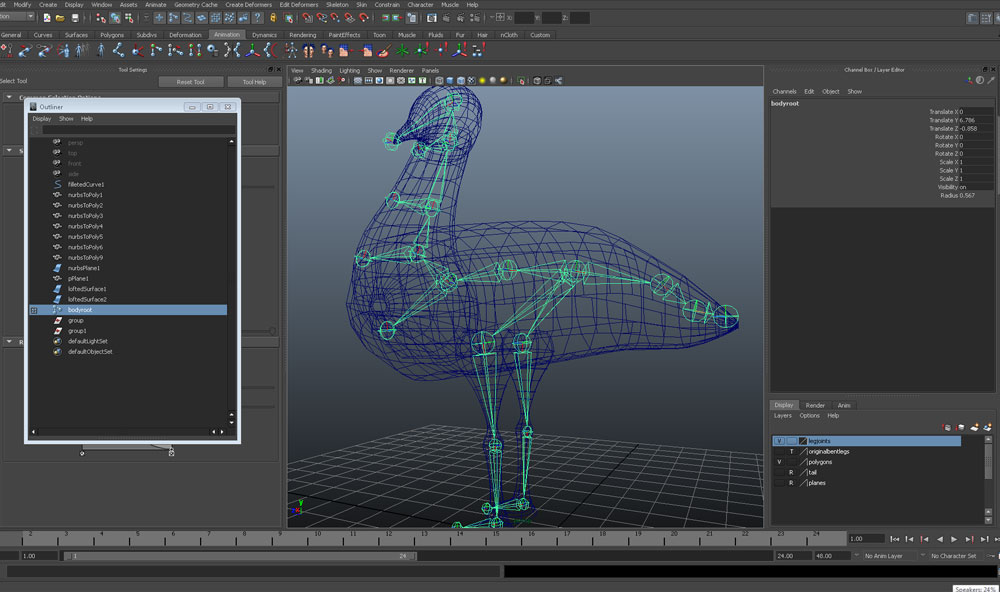
That was better, it seemed to fit well and after checking it from all angles, looked good enough to move onto the next stage, IK rigging, which would give me more control over movement.
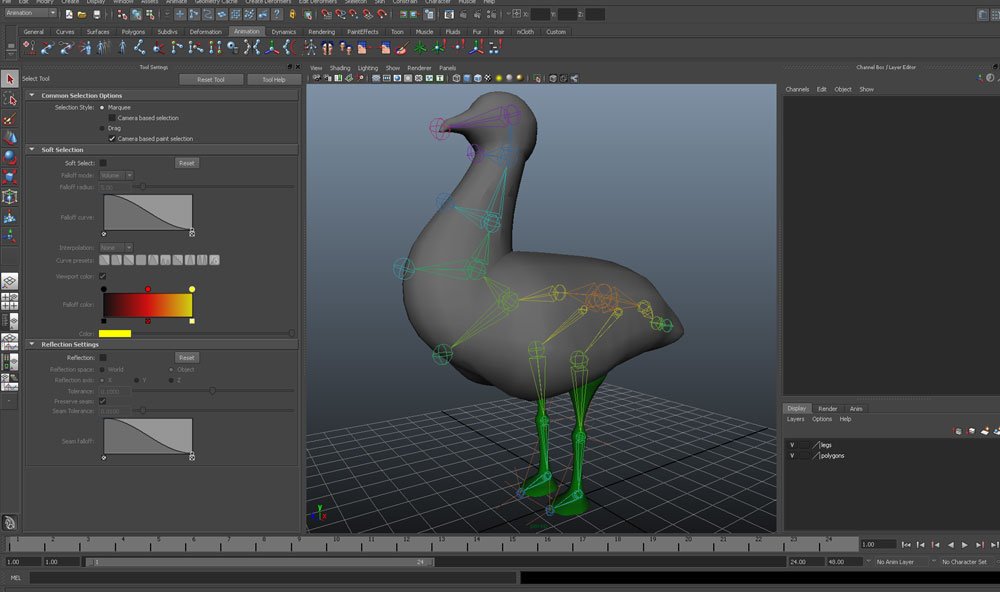
After viewing the online Lynda.com tutorial I decided to give the IK rig a go. Firstly I tried rigging the whole leg from hip (in the main bodyroot joint) to toe, but this wouldn’t give the mobility I wanted and actually moved the whole model, rotating it from the spine, so I had to go back, delete the leg joints and create an intermediary joint which would act as the hip…
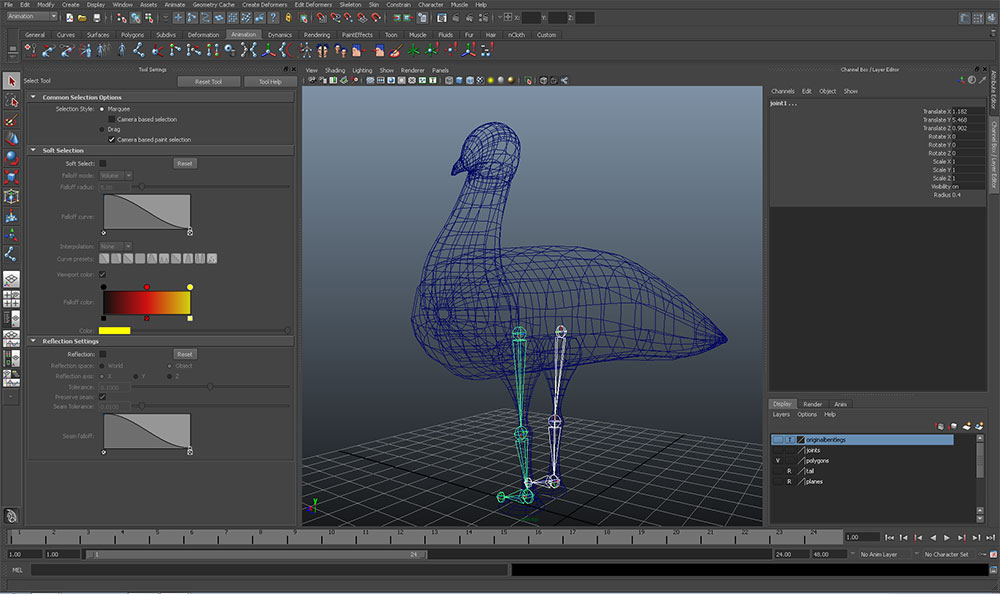
After applying the IK rig again, it still wouldn’t move the third joint, what we would perceive as the ‘backward knee’ but is in fact the birds ankle. This is the joint which we see move the most, so I deleted the IK rig and decided I’d have to do it a different way… After a bit of thought, I wondered if I could put two IK rigs into the same leg. I did this from the hip to the ankle and from the ankle to the toe and it seemed to give me more of the movement I required.
The next step is to bind the skeleton to the model, selecting the rig and all of the Great Bustard shapes I used the smooth bind to put the bones inside my bird.
I then intrepidly selected the move tool and had a go at bending the left leg. It wasn’t great, it takes in too much of the surrounding shape, affecting the other foot with the lower ik rig and distorting the torso way too much with the top part of the leg rig. It was so disappointing, I tweaked and painted weights and went back and forth from tutorial to model, taking the unbinding the skeleton and trying different parameters but I just couldn’t get it working how I wanted to.
I will go back tomorrow and try and find some research or back information on rigging a bird as all of the tutorials and ready made rigs are humanised in MAYA so, of course, mine all needs to be custom made.. The software will not beat me!


Leave a comment